Photos
The Images page is where the frame’s photos live. What it shows depends on the photo library backend: local files you upload, or a synced Immich album. You pick the backend in Settings → Photo library (see Configuration basics).
Local photos
Section titled “Local photos”With the default local files backend, you upload and manage photos here directly.
Uploading
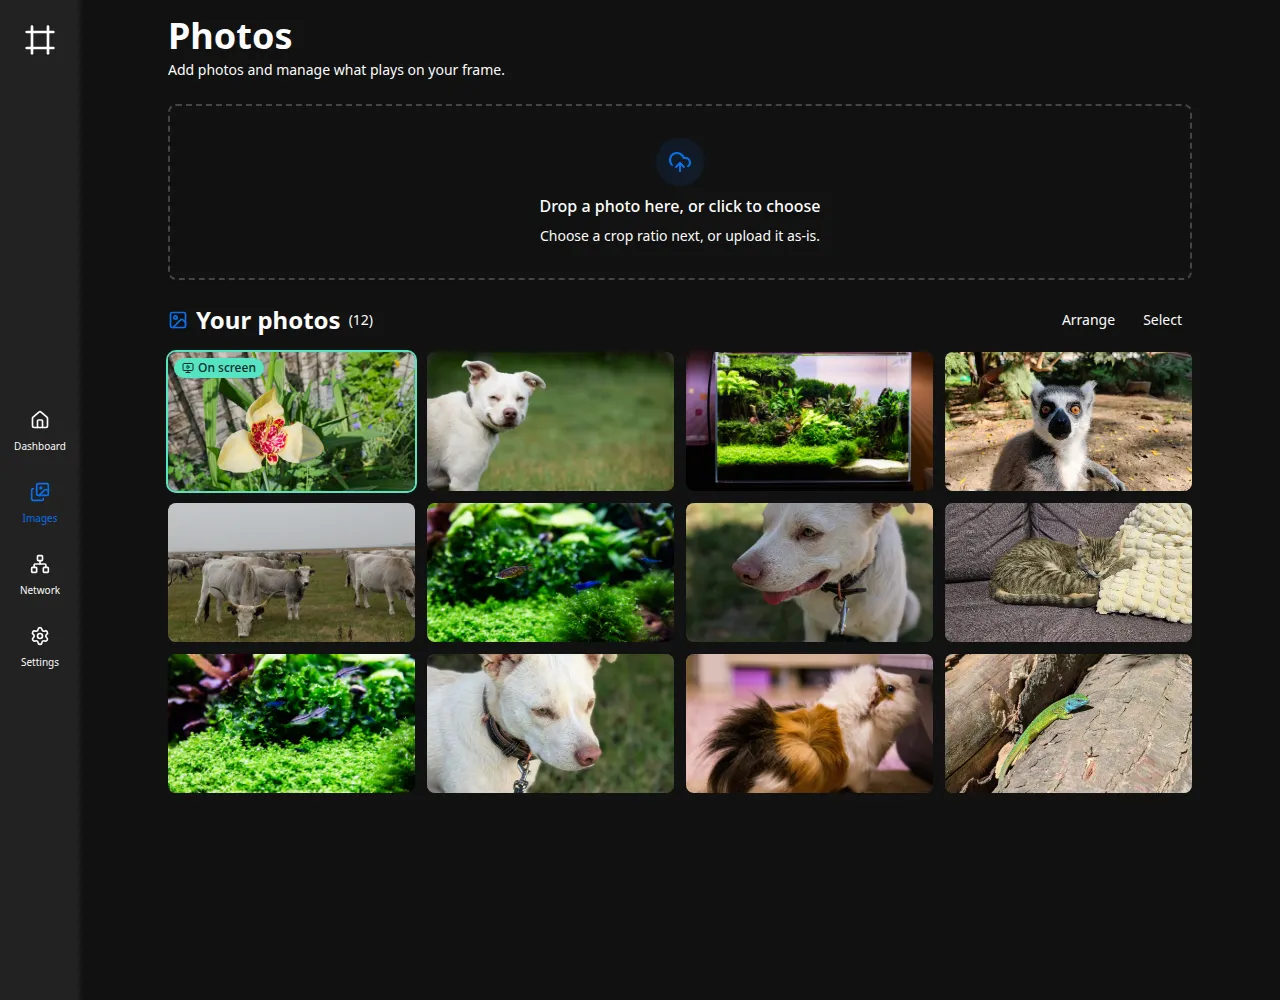
Section titled “Uploading”Drag image files onto the upload area, or click it to pick them. A single photo opens a quick cropper.
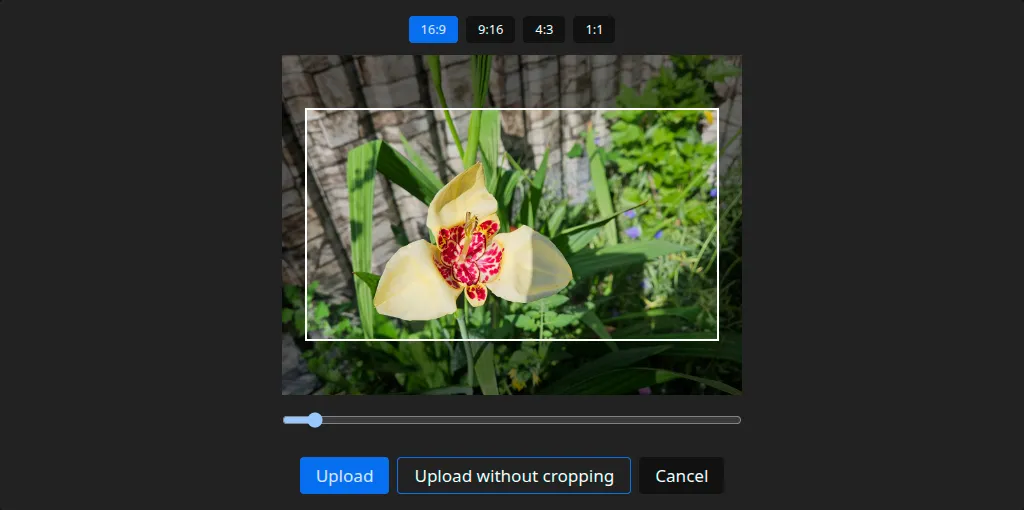
Choose an aspect ratio for the screen (16:9 by default, or 9:16, 4:3, and 1:1), then drag and zoom to frame the shot. The cropper remembers your last ratio. Upload stores the cropped result, so large camera files shrink to what the screen shows.
To keep the whole photo, choose Upload without cropping: it saves the image uncropped, scaled down to fit. Either way the frame stores a JPEG.
Adding several at once
Section titled “Adding several at once”Pick or drag more than one photo and the cropper is skipped: every photo is added uncropped, scaled to fit, the same as Upload without cropping does for one. The upload area counts them off as they go, and Stop ends the batch, keeping whatever has already been added.
Up to 200 photos at a time. Select more than that and none of them are added, so pick fewer and go again.
Photos go up one at a time over your network, so a large batch takes a while, and the grid fills in once the batch finishes. A photo that cannot be added, whether the browser fails to read it or the frame turns it down, is skipped and named at the end, so you can add just those again. If the frame stops responding altogether, the batch gives up rather than working through the rest.
Managing the grid
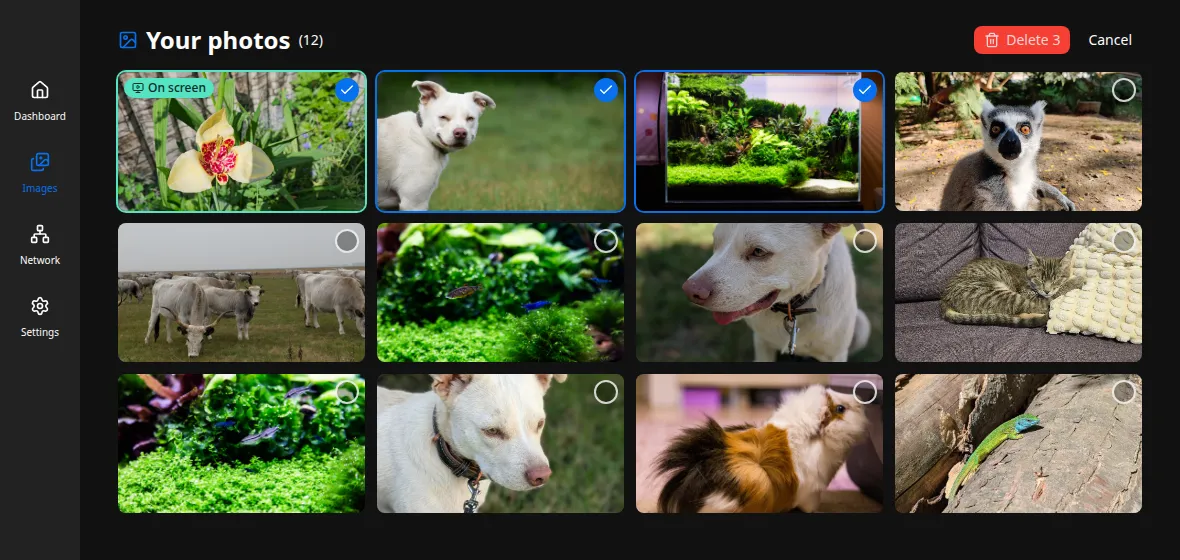
Section titled “Managing the grid”Uploaded photos appear in the grid below. The one currently on the frame is marked with an On screen badge. Hover a photo for a delete button, or click it to open a larger preview.
To remove several at once, use Select, tick the photos you want gone, and Delete them in one step. Both single and bulk deletes ask for confirmation first.
Arranging the order
Section titled “Arranging the order”Arrange sets the order photos play in. Click it, then reorder the grid: drag a photo to a new spot, or use the buttons on each one to move it up, down, to the start, or to the end. Done saves the arrangement.
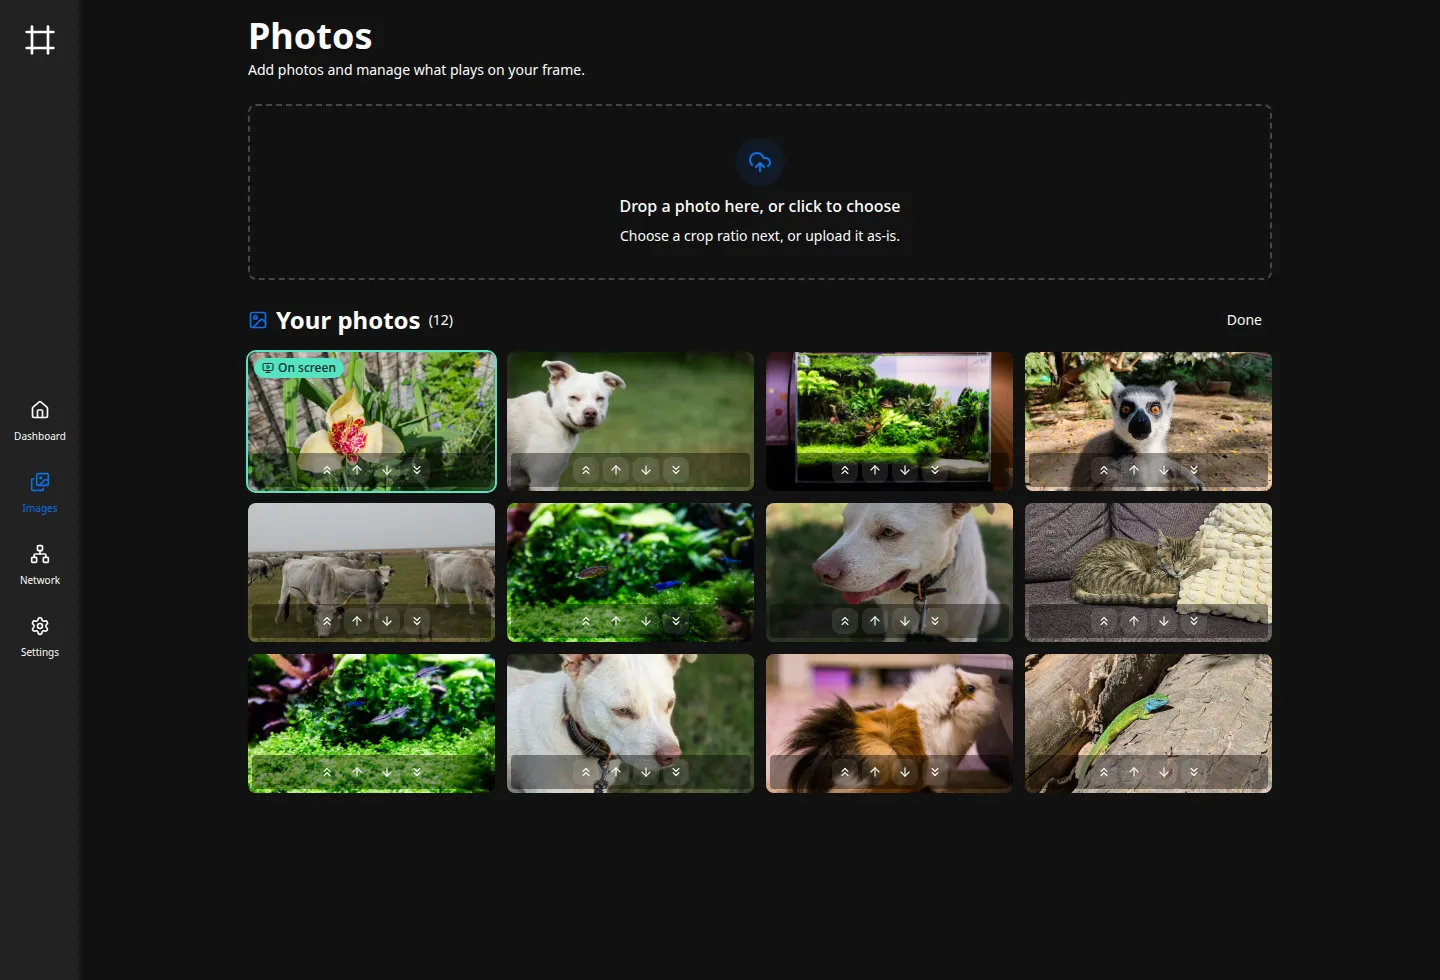
The order you set is what plays when Shuffle photos is off (see Slideshow & display), and Done restarts the frame on it right away. With shuffle on, a banner notes the order won’t affect playback until you turn shuffle off. New uploads join the end. Arranging is for local photos; an Immich album keeps its own order.
To choose which two photos appear side by side under split-screen pairing, put them next to each other.
Using Immich instead
Section titled “Using Immich instead”To pull photos from Immich rather than uploading them, switch the backend to immich in Settings → Photo library and give it a shared-album link:
- In Immich, create a shared link for the album you want on the frame. A password is optional.
- Paste the share URL (and password, if any) into the Photo library settings. Either link shape
works:
https://your-server/share/<key>, orhttps://your-server/s/<slug>if the link has a custom URL. - Set how often the frame reconciles with the album, then save and restart.
The frame then keeps a local copy of the album in sync, and the Images page becomes read-only:
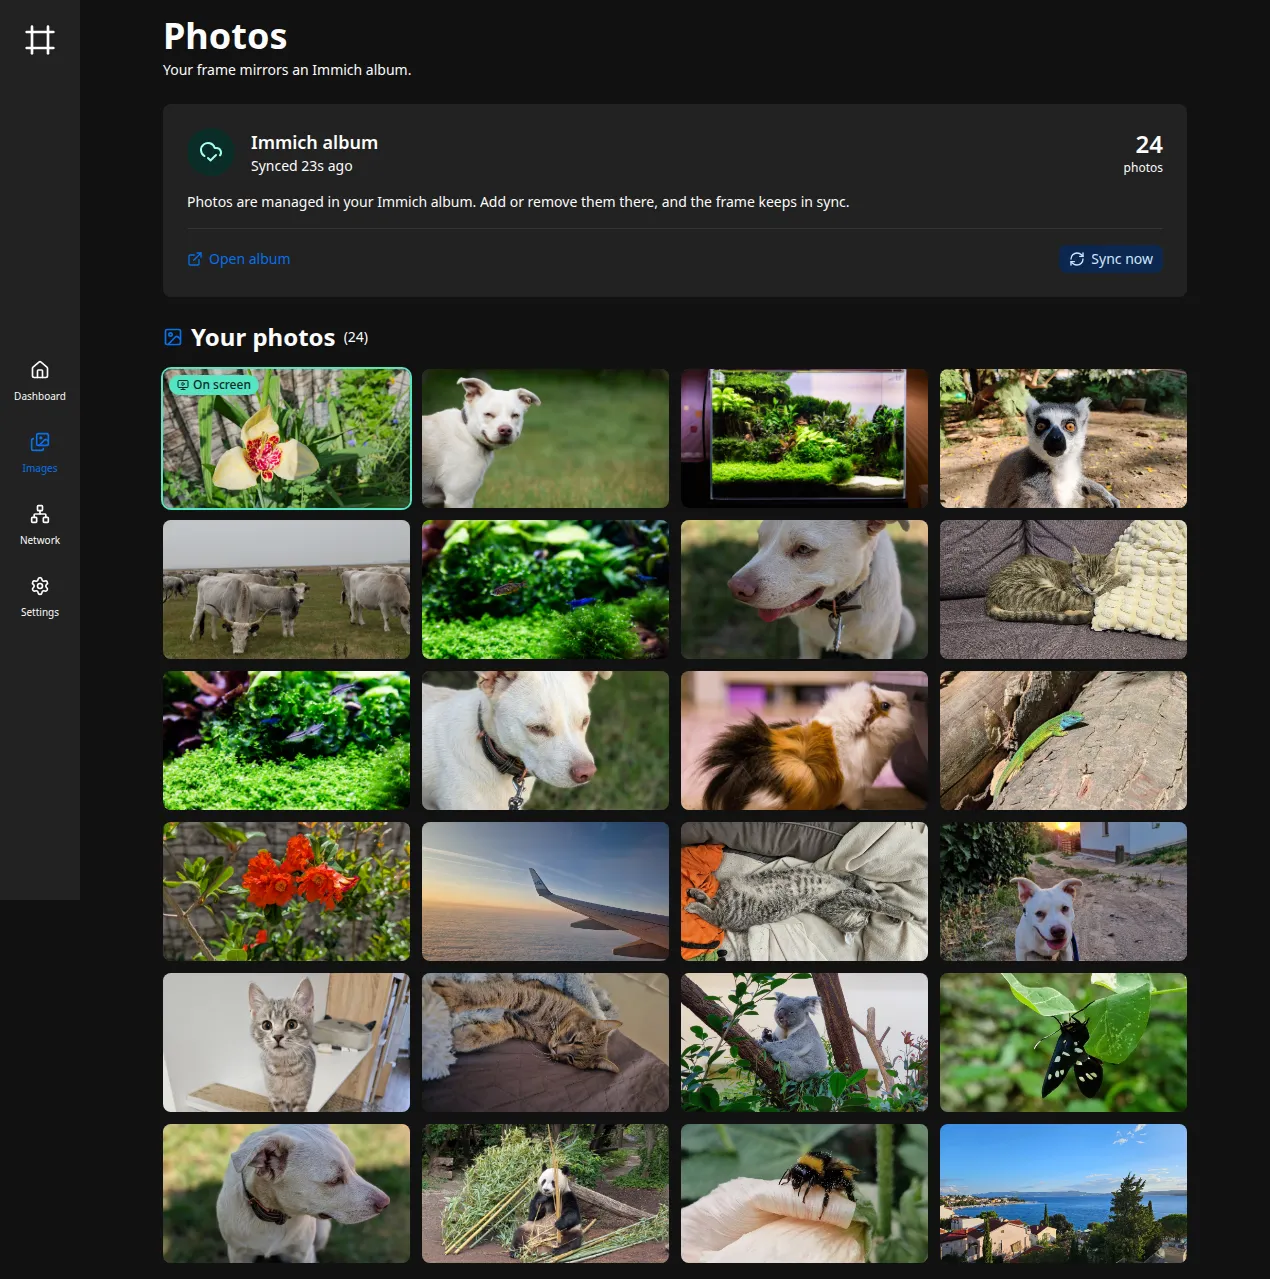
The status card shows when the album last synced and how many photos it holds. Sync now reconciles immediately instead of waiting for the next interval, Open album jumps to the album in Immich, and a failed sync is flagged here with the reason.
Where photos live
Section titled “Where photos live”Local uploads and the synced Immich cache both sit under the images directory
(slideshow.images_dir, default images). The backend and Immich link are stored under
[library]. Every key is documented in the configuration reference.